Setting up IM on your account
The app has two kinds of text messaging: IM (instant messages, sent through your provider’s chat server) and SMS (regular text messages sent through your SIP phone number). They live on separate filters under Messages and have separate settings. This article covers IM only.
Before you begin
IM is gated by a switch in the SessionCloud portal — Provisioning → Advanced → XMPP → IM & Presence. If your provider hasn’t turned it on, the XMPP Accounts section may not be reachable in the softphone. If you’re the provider setting this up, see XMPP & Messaging for the portal side. If you’re an end user, ask your provider to enable it first.
Setting up your IM account
When you sign in with your provider ID, the app is configured for your provider’s chat server in the background. But there’s no IM account entry yet — you have to add one with your identity: an account name, your IM username, and your IM password.
Your provider gives you the IM username and password separately from your provider ID login. If you don’t have them, ask your provider.
To set up your IM account:
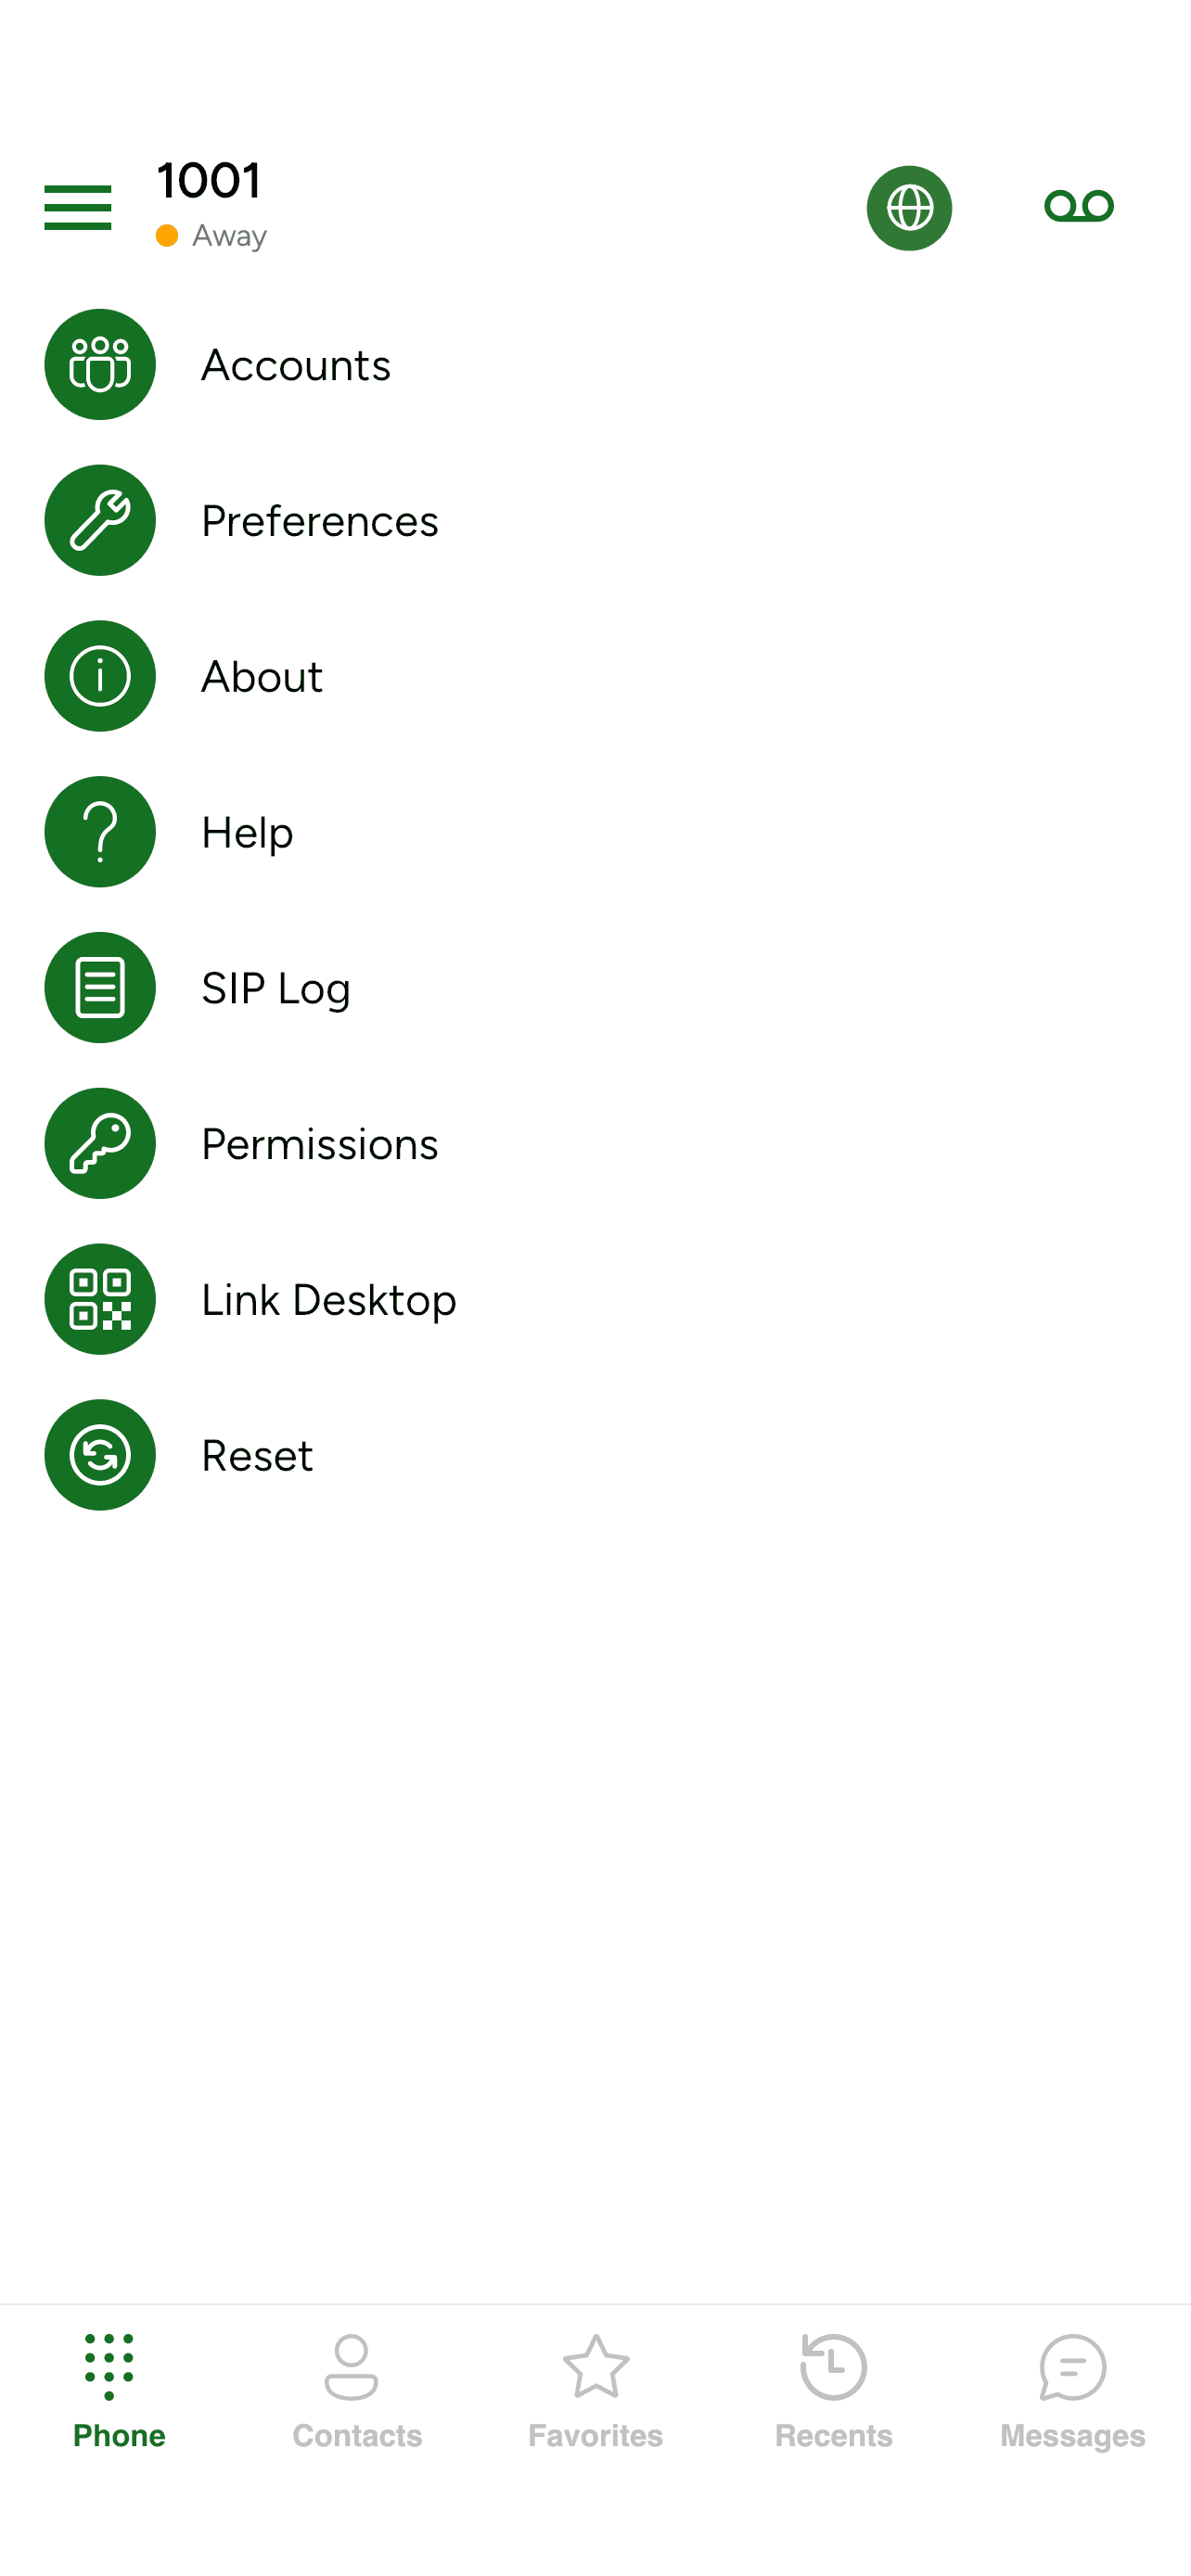
- Tap the hamburger (three-line) icon in the top-left of the screen.
- In the drawer, tap Settings.
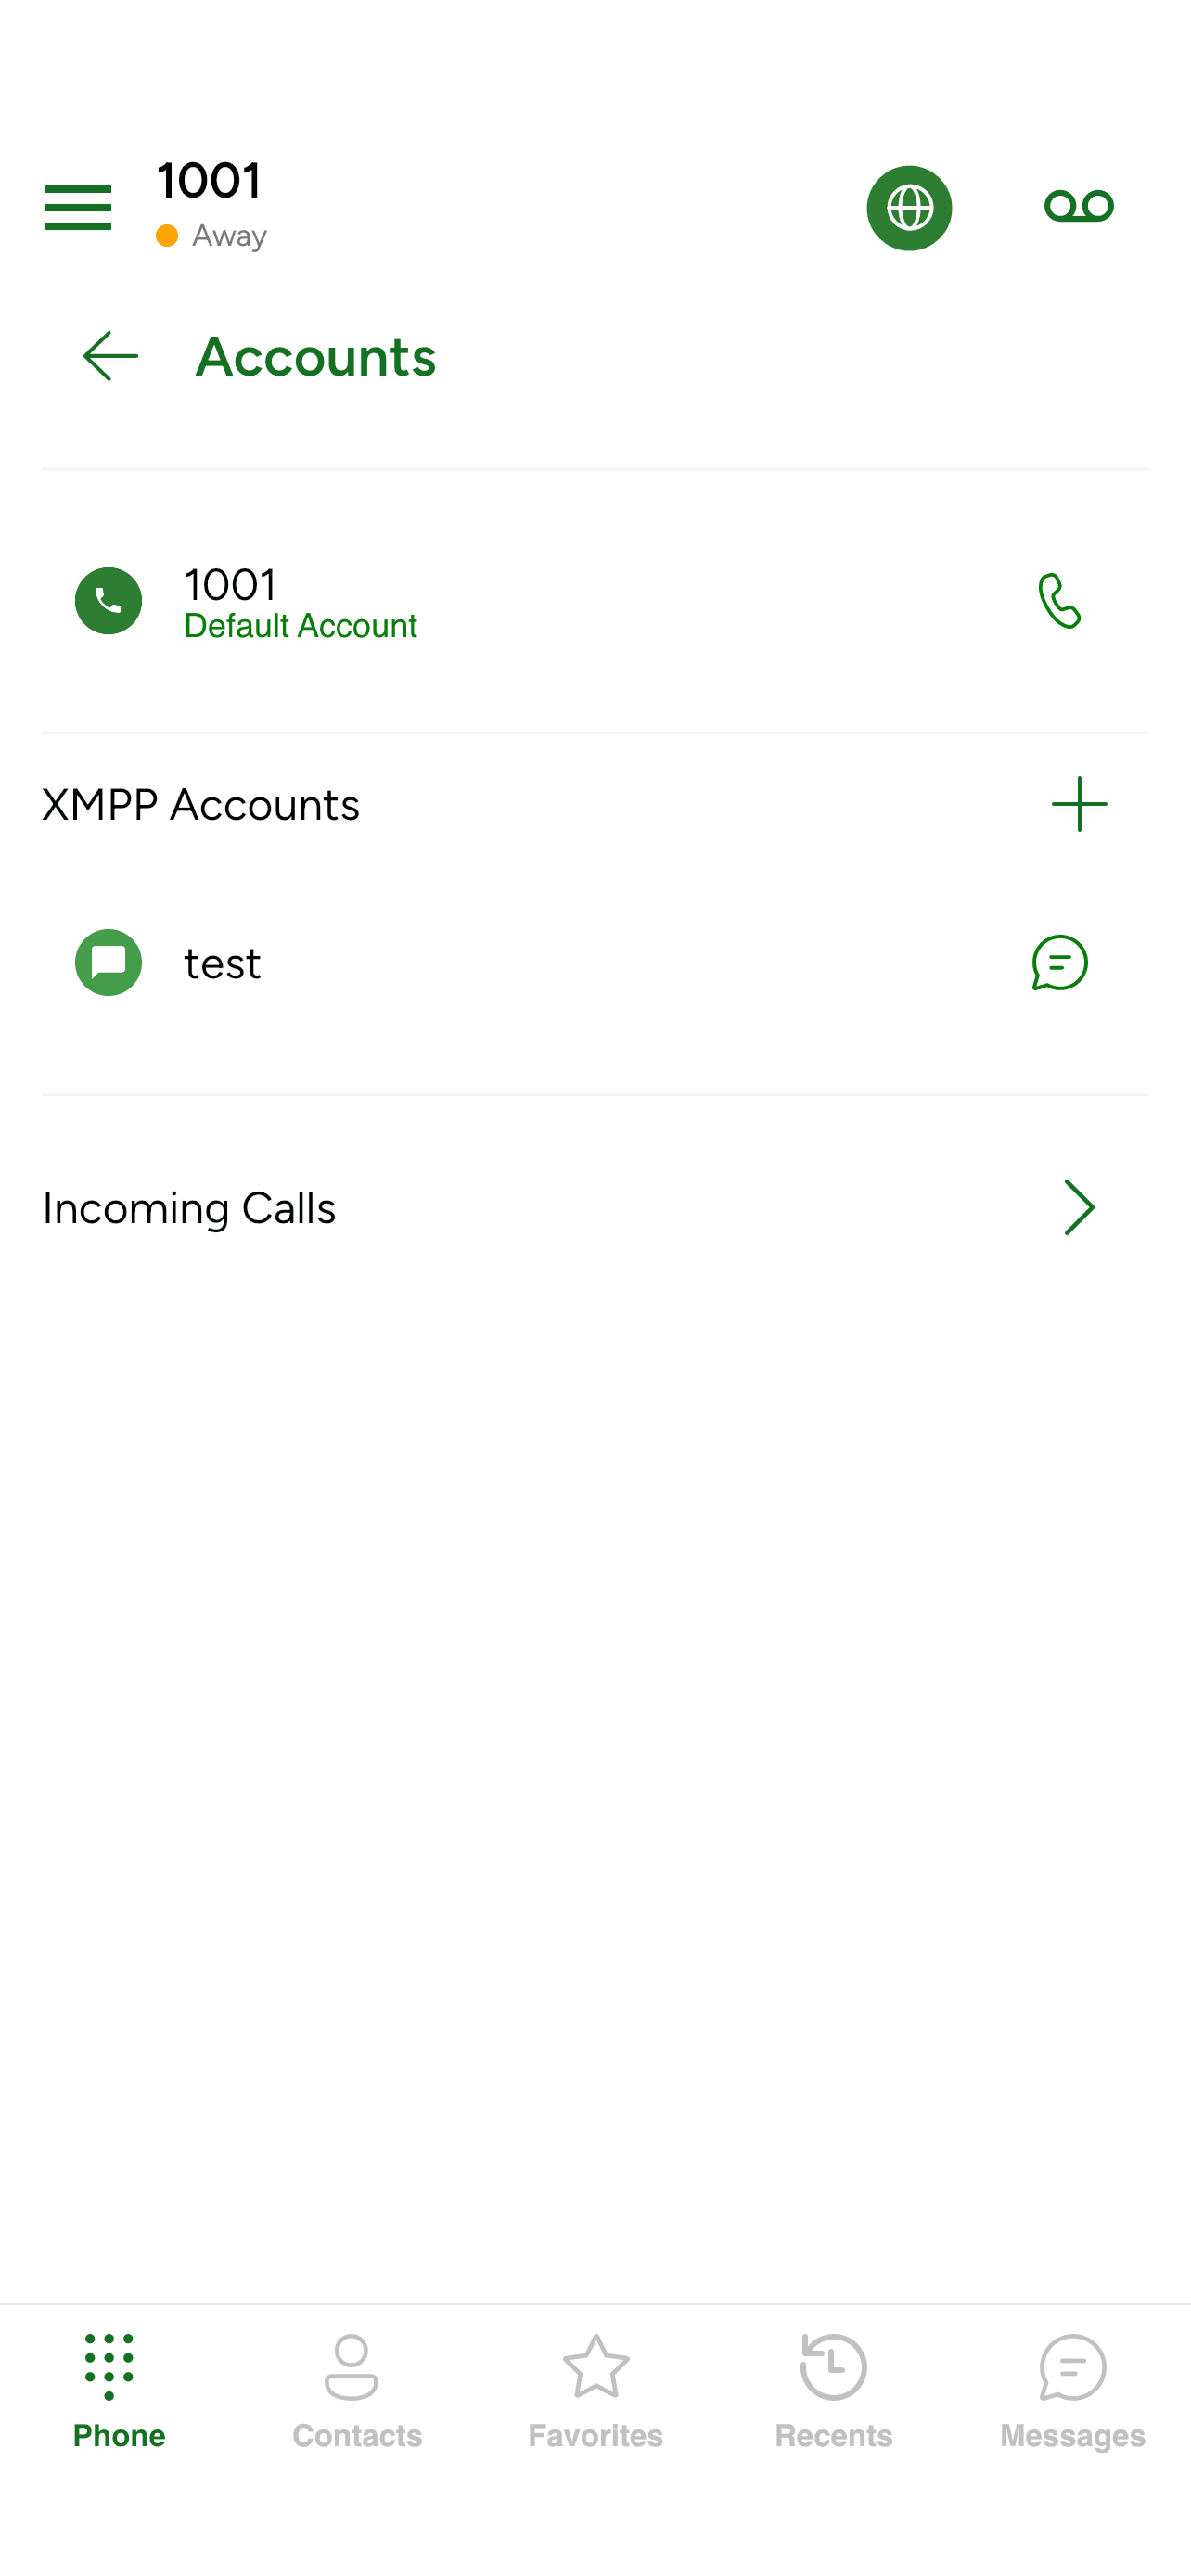
- Tap Accounts.
- Scroll to the XMPP Accounts section.
- Tap the + button next to the section header.
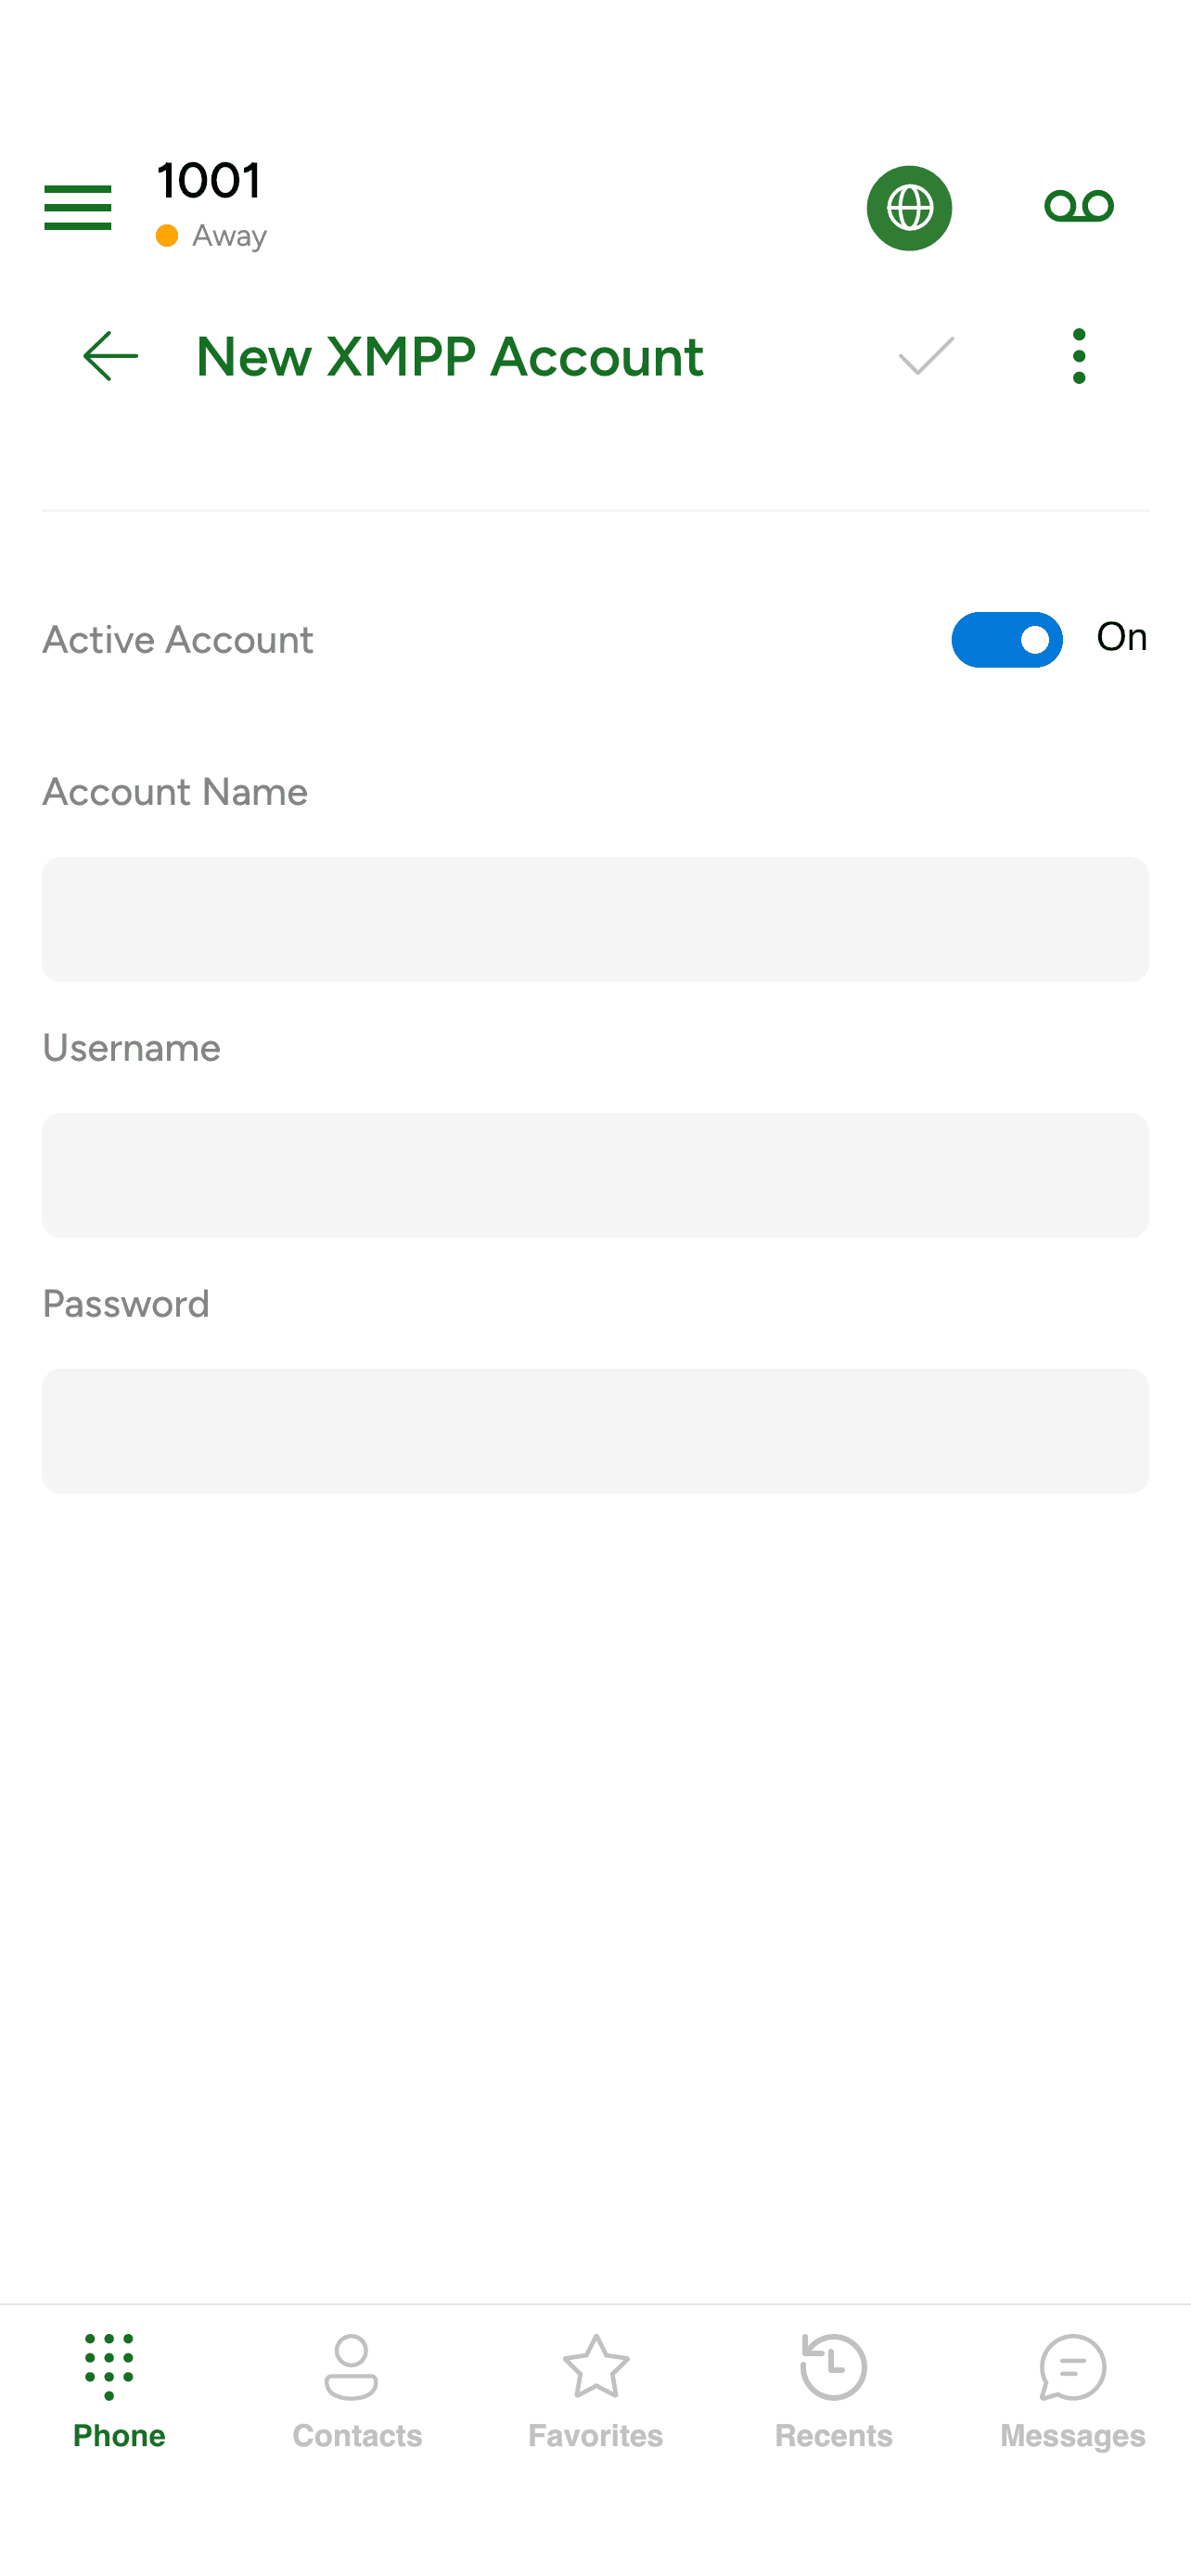
- A form opens with four things on it: an Active Account toggle at the top (leave it on), and three text fields. Fill the three fields in:
- Account Name — any label you like (e.g. “Work chat”).
- Username — your IM address, e.g.
alice@chat.example.com. - Password — your IM password.
- Tap the checkmark button in the top-right of the form to save.
The new entry appears in the XMPP Accounts list and starts connecting straight away.
Checking IM is on
To see whether IM is up:
- Tap Messages in the bottom bar.
- Tap IM at the top of the screen.
If IM is connected this is where your one-to-one IM conversations will appear. On a fresh install with no messages yet you’ll see an empty view — that’s normal. Once you exchange a message with someone, they’ll show up here. See Sending IM messages for how.
Editing your IM account later
The same XMPP Accounts entry is where you go later if you need to change your password or turn IM off temporarily. Open it the same way — hamburger icon → Settings → Accounts → XMPP Accounts, tap the entry — and you’ll see the same four things:
- Active Account — turn IM on or off for this account.
- Account Name — the label you chose.
- Username — your IM identity.
- Password — your IM password.
You can turn Active Account off if you want to sign out of IM without signing out of the app; turn it back on when you want IM again.
The section is called XMPP Accounts because IM in this app runs over the XMPP protocol. You’ll see “XMPP” in one or two other places — like the Add Buddy dialog, which shows “XMPP” or “SIP” next to each account so you can pick the right one. Everywhere else, the same feature is just called IM.
When IM won’t connect
If IM under Messages stays empty for more than a minute after you save:
| Symptom | What to try |
|---|---|
| Nothing under IM even though the account is saved | Open Settings → Accounts → XMPP Accounts and check Active Account is on |
| You’ve just changed your password and IM won’t connect | Update the Password on the XMPP Accounts entry to match, then wait a few seconds for it to reconnect |
| The device can’t reach the internet | Check other apps can load — if they can’t, that’s the problem |
| Everything looks right and IM still won’t connect | Contact your provider. The chat server address and other advanced settings aren’t shown in the app — if your Account Name / Username / Password are correct and IM still won’t connect, it’s a server-side or account-side issue they need to look at. |