Rooms
A Room is an IM group conversation. Anything you post in a room is seen by everyone else who has joined it, and the room stays on your provider’s chat server whether or not your app is open. Rooms are part of the IM feature — they’re separate from SMS.
If IM isn’t set up yet, start with Setting up IM.
Opening the Rooms screen
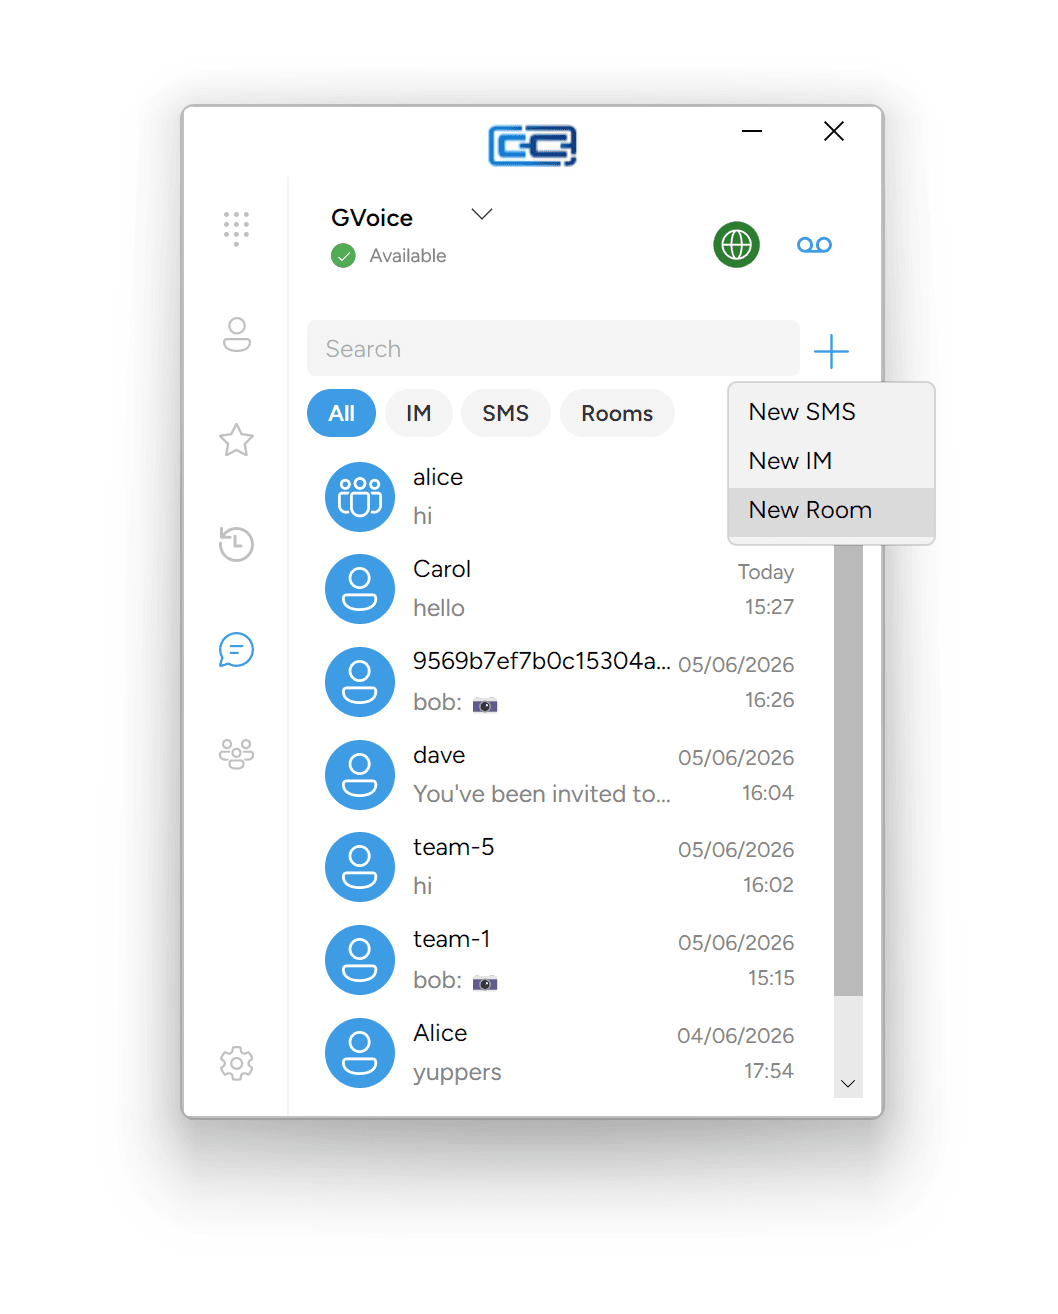
Rooms live behind the same New Room shortcut in Messages. From there you’ll pick whether you want to create a fresh room or join an existing one.
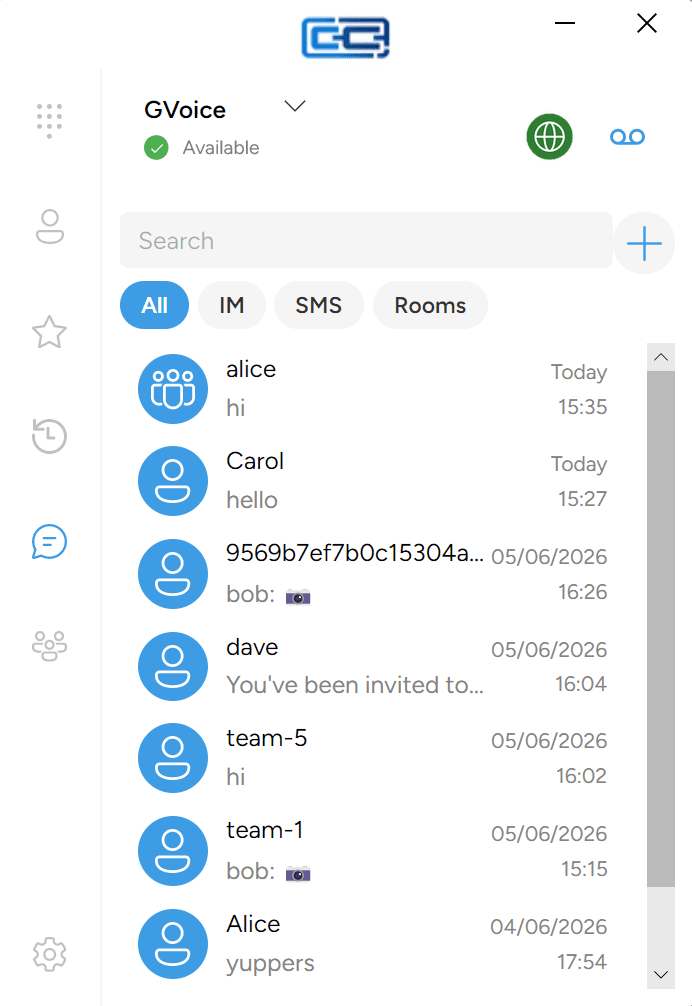
- Click the Messages icon in the left rail.
- Click the + button in the top-right of the messages list.
- Click New Room in the menu.
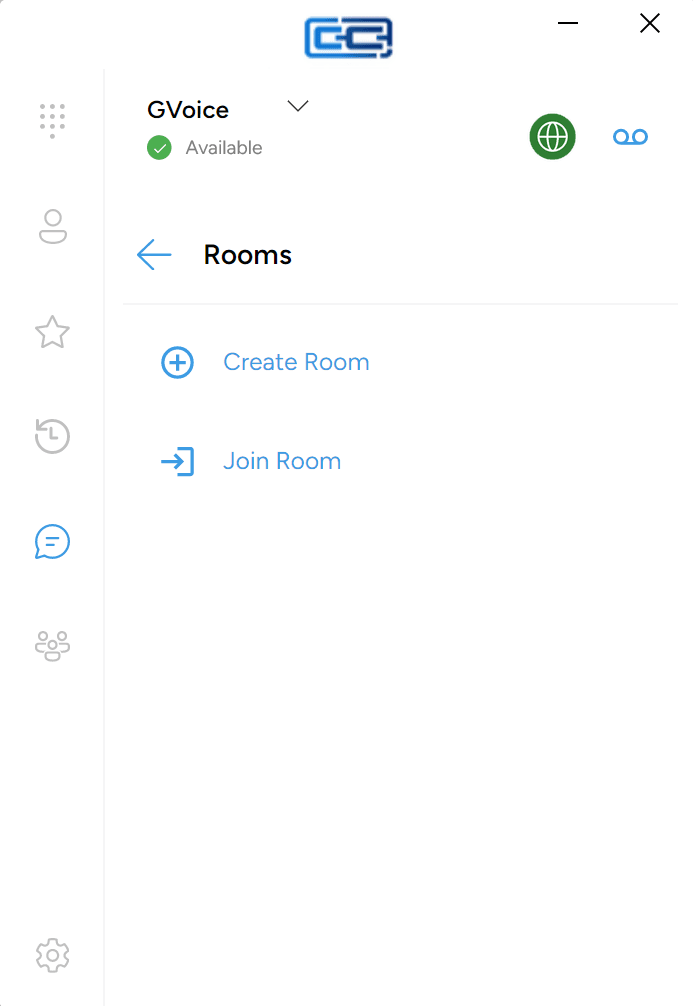
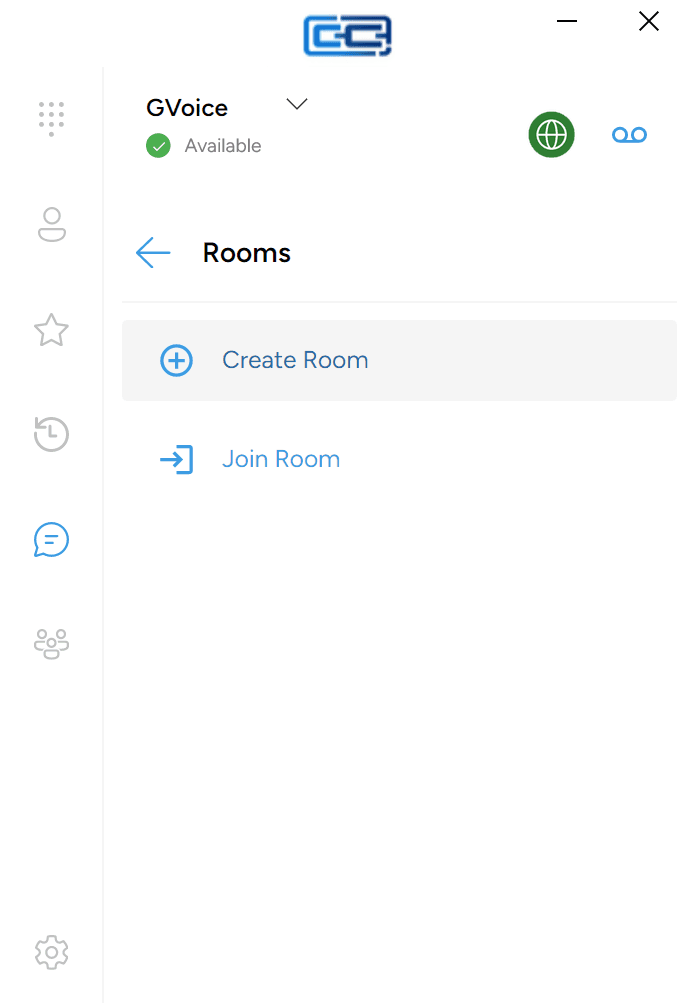
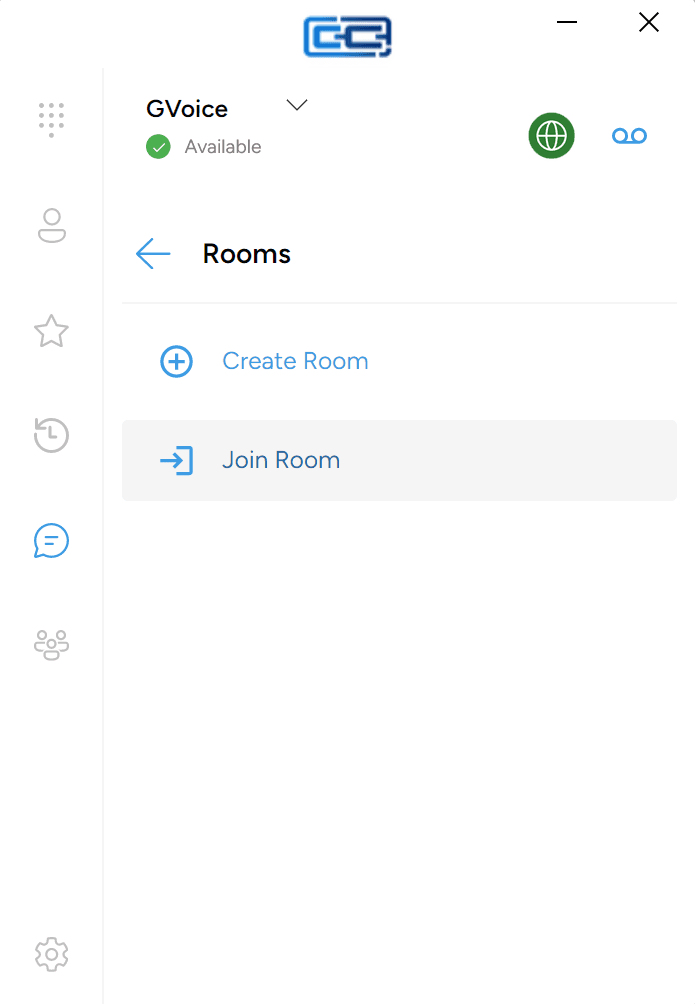
A Rooms screen opens with two options:
- Create Room — make a brand-new room that other people can join.
- Join Room — look through rooms that already exist on your provider’s server and walk in to one.
Click whichever you want.
Creating a new room
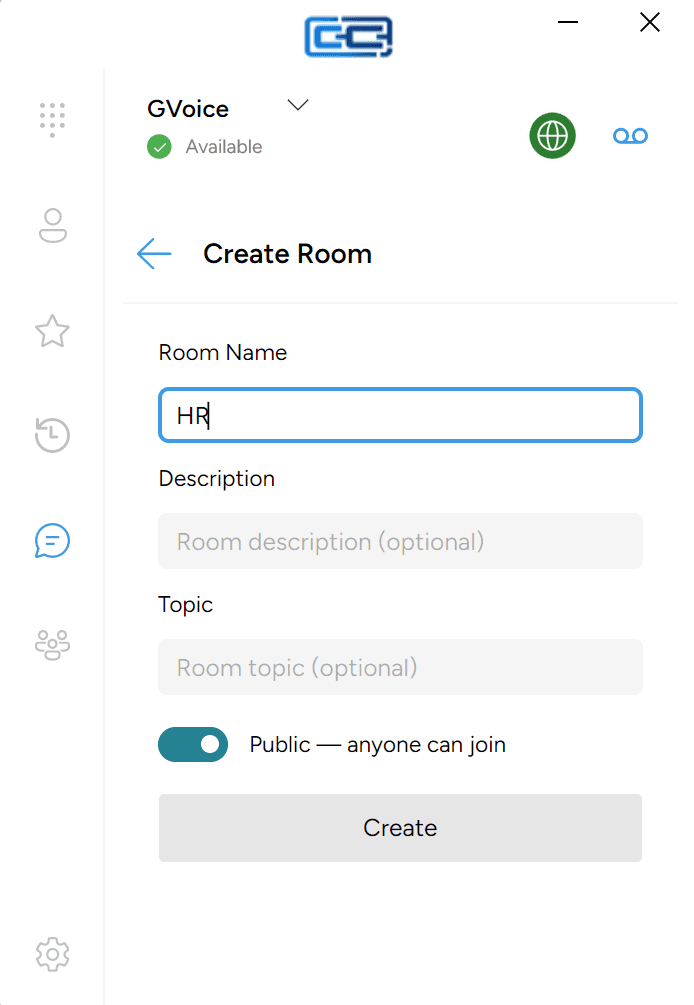
If you clicked Create Room, a form opens. Fill in:
- Room Name — how the room will show up in your Joined Rooms list and in other people’s search results.
- Description (optional) — a one-line summary of what the room is for.
- Topic (optional) — the current subject of discussion; shown as a subtitle inside the room.
- Public / Private toggle:
- Public — anyone can join means the room appears in every user’s Available Rooms list, and anyone on your server can walk in.
- Private — invitation only means the room is hidden from Available Rooms; the only way in is through an invitation from you or another member.
If you pick Private, an Add Members section appears below the toggle with a checkbox for each of your buddies. Tick everyone you want to invite when the room is created. Public rooms don’t need an invite list — anyone can find and join them on their own.
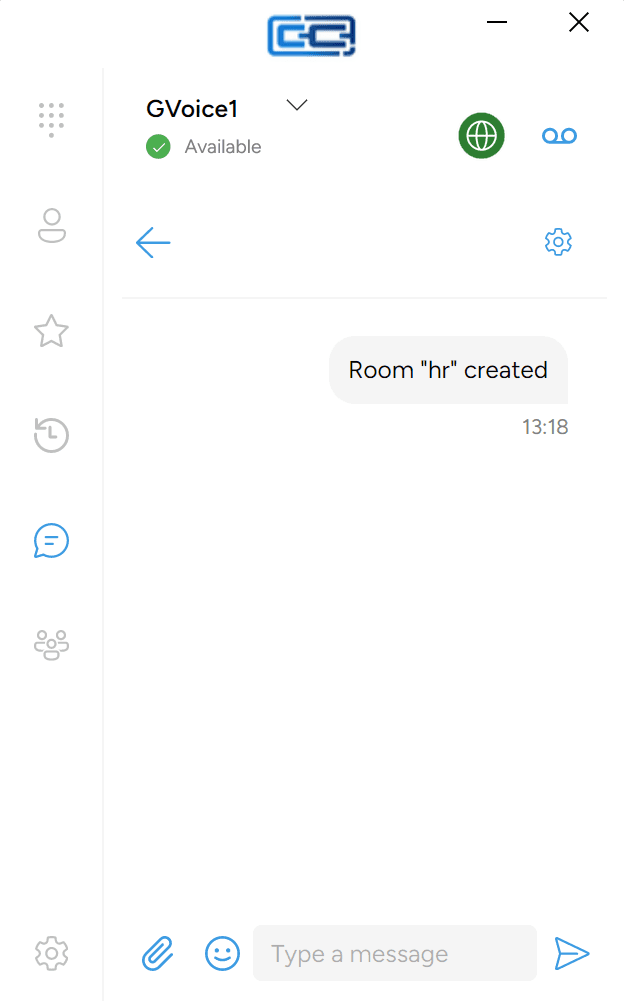
Click Create at the bottom. The room is created on your provider’s chat server and you’re taken straight into it. It appears in your Joined Rooms list from now on.
Joining an existing room
If you clicked Join Room, the Join Room screen opens with two lists:
- Available Rooms — rooms on your provider’s server that you can walk in to.
- Joined Rooms — rooms you’re already a member of.
Under Available Rooms, click the Join button next to the room you want. You go into the room straight away, and it moves up into Joined Rooms for next time.
Recent conversation loads so you can see what people have been talking about. From then on, room messages appear on the Messages screen alongside your one-to-one messages. To filter down to only rooms, click the Rooms pill at the top of the Messages screen.
Some rooms are open to anyone on your server; others are members-only and won’t show up under Available Rooms until an existing member has invited you. If a room isn’t there and you think it should be, ask your provider or the room’s owner whether you need to be invited to it directly.
Sending messages in a room
Once you’re inside a room, sending a message is the same as a one-to-one IM — type in the Type a message box, then click the Send button. See Sending IM messages for the full details.
A couple of things behave differently in a room:
- Every message shows the sender’s name above the bubble so you can tell who’s speaking. In one-to-one chats there’s only one other person, so no name is shown.
- Everyone in the room sees each message, not just one person.
- The delivered checkmark isn’t per-member. In a one-to-one conversation the green checkmark confirms the other person’s device has received your message. In a room the checkmark just confirms the server has accepted the message; the app doesn’t track delivery to each individual member.
Opening the room’s details
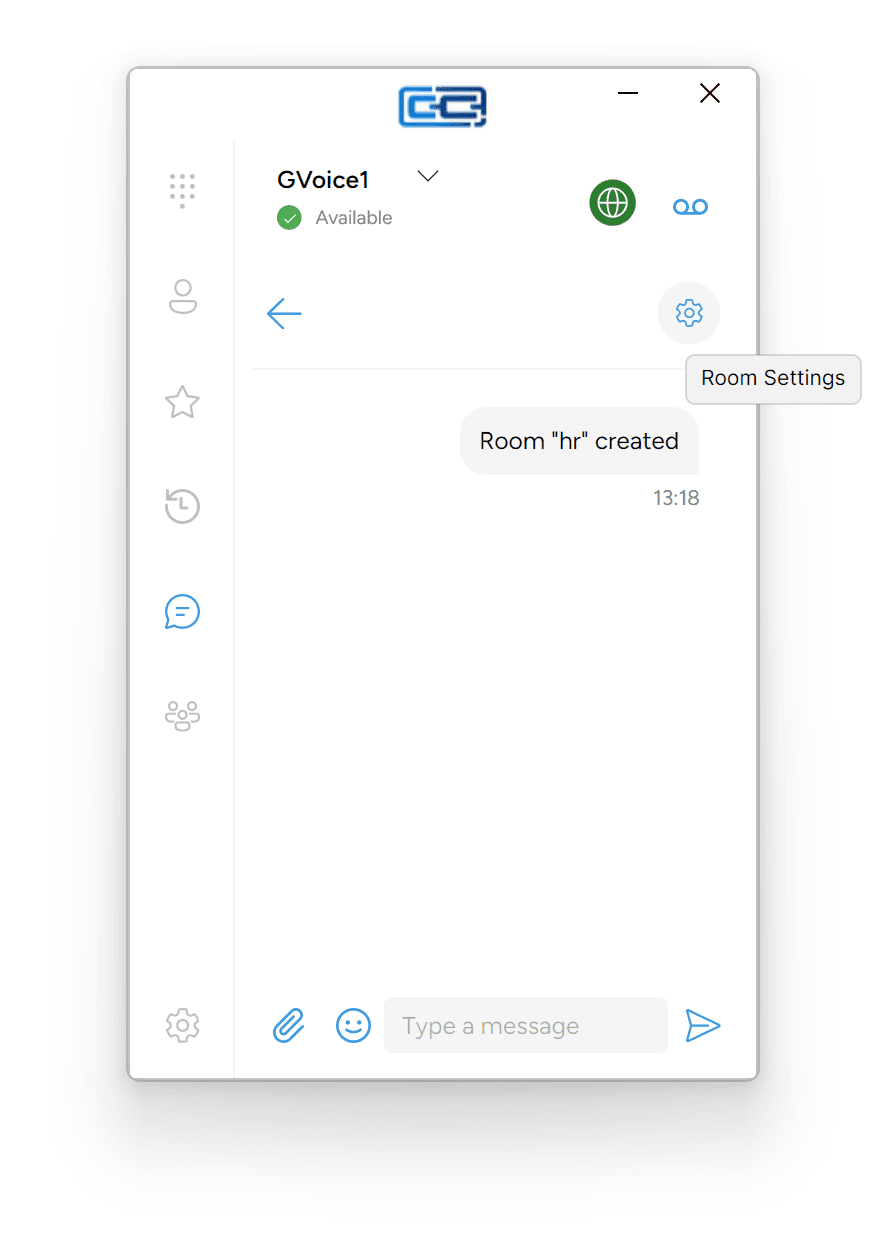
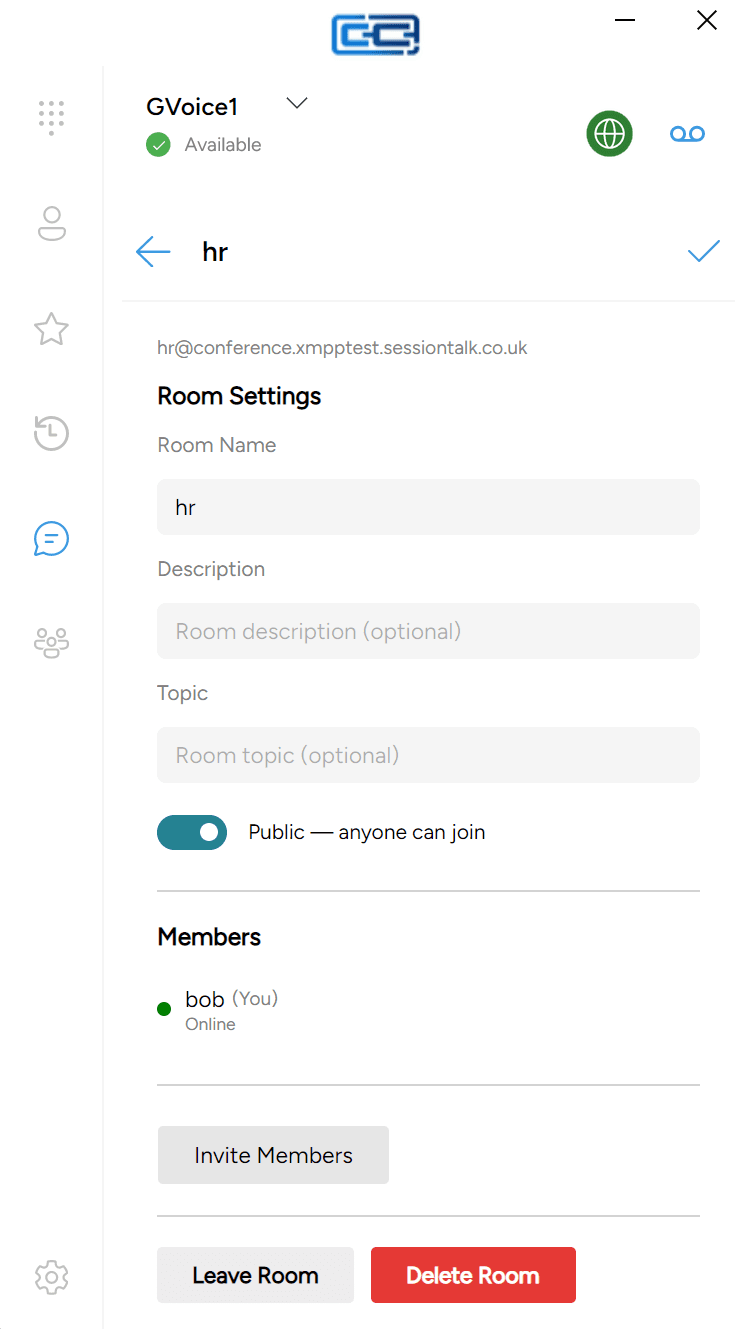
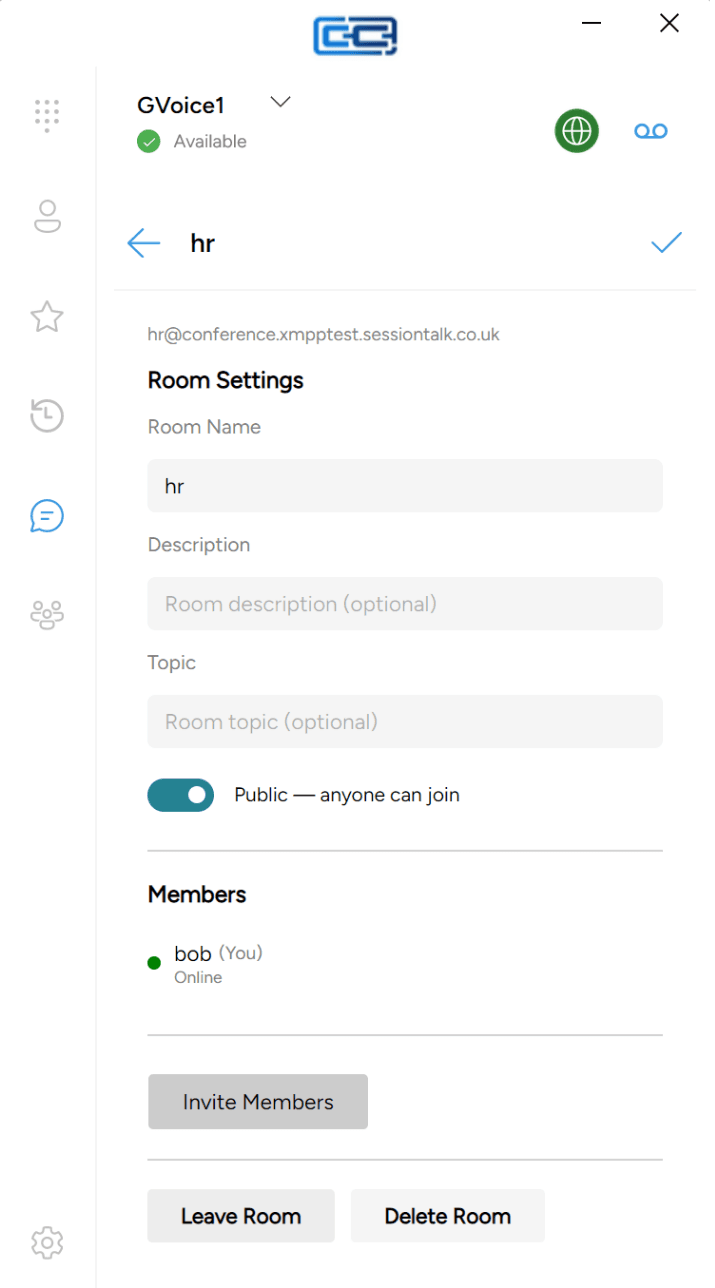
Every room has a details panel showing settings, members, invites, and controls for leaving. To open it, click the gear icon in the top-right of the room’s conversation header — that icon only appears for rooms, not one-to-one chats.
The details panel is one scrollable page containing:
- Room JID — a small greyed-out identifier at the top, showing the room’s address on the chat server. You don’t need it for day-to-day use.
- Room Settings — the room’s settings (Room Name, Description, Topic, and the Public/Private toggle). Shown only to room owners and moderators. When an owner/moderator edits any of these fields, a checkmark (Save Settings) button appears in the top-right of the panel — click it to write the changes back to the server.
- Members — everyone currently in the room. Each entry shows the member’s nickname (with “(You)” next to yours) and a short status line underneath.
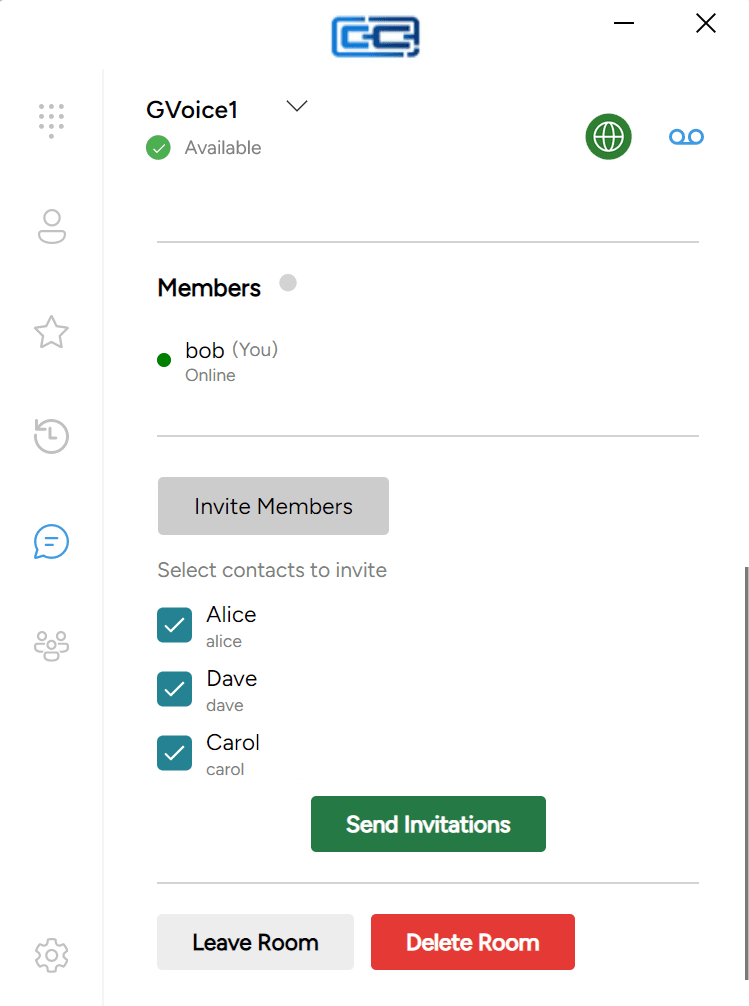
- Invite Members — a button that expands an inline picker for choosing buddies to invite (owners/moderators only).
- Leave Room — leave the room.
- Delete Room — deletes the room, shown only to room admins.
Inviting buddies
Inviting is available to room owners and moderators.
- In the room, click the gear icon.
- Click Invite Members.
- A “Select contacts to invite” panel expands below the button with a checkbox for each of your buddies. Tick everyone you want to invite.
- Click Send Invitations.
Each buddy who accepts the invitation will see the room appear in their own Joined Rooms list.
Removing a member
If you’re a room owner or moderator, you can remove someone from the room:
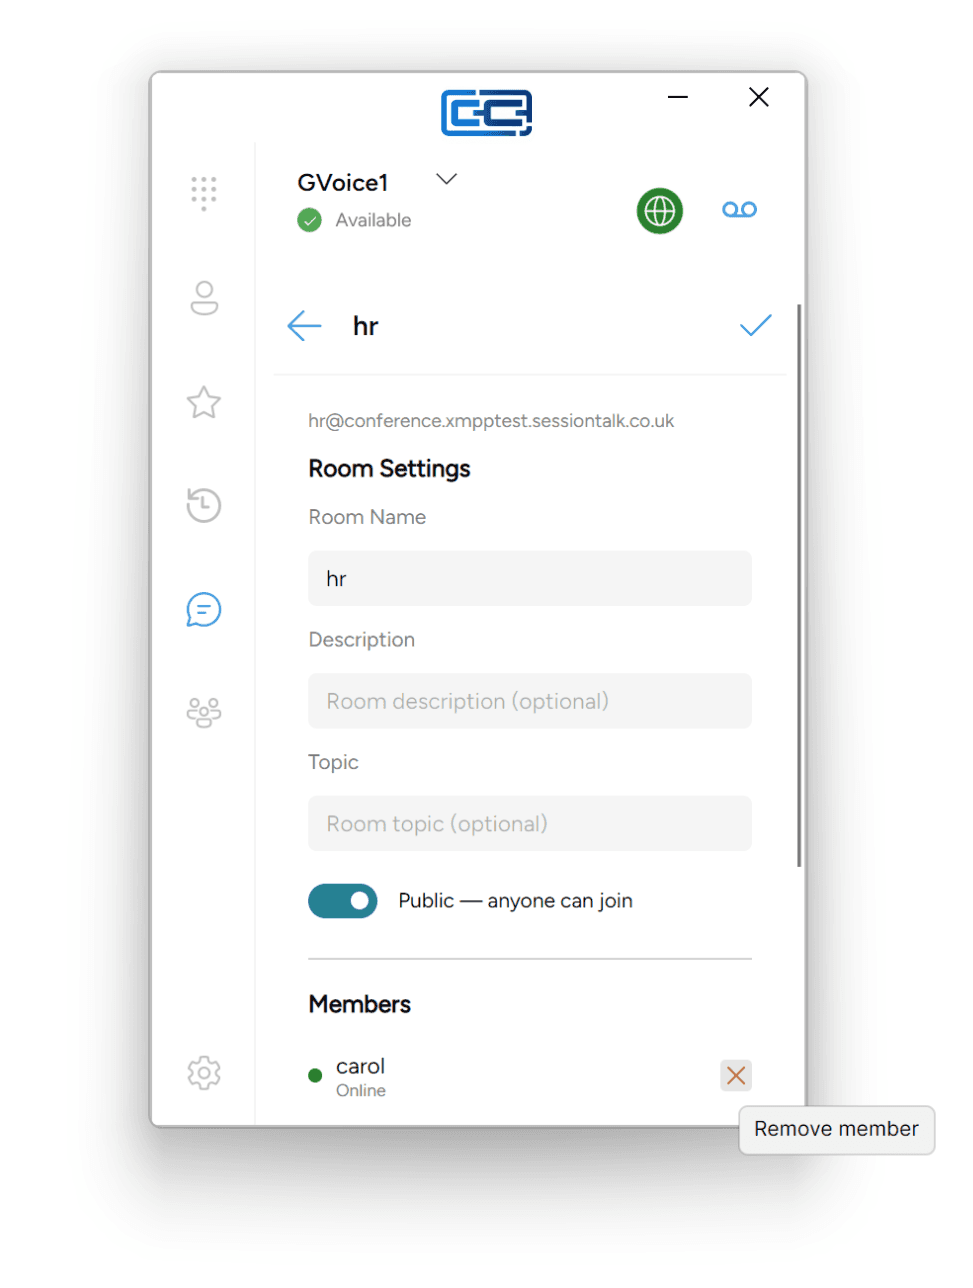
- In the room, click the gear icon.
- Under Members, click the small red X icon next to their entry. (Hover the icon and the tooltip reads “Remove member”.)
They stop receiving messages from the room. If you don’t see the X next to a member, either you don’t have permission to remove that member or it’s yourself.
Leaving a room
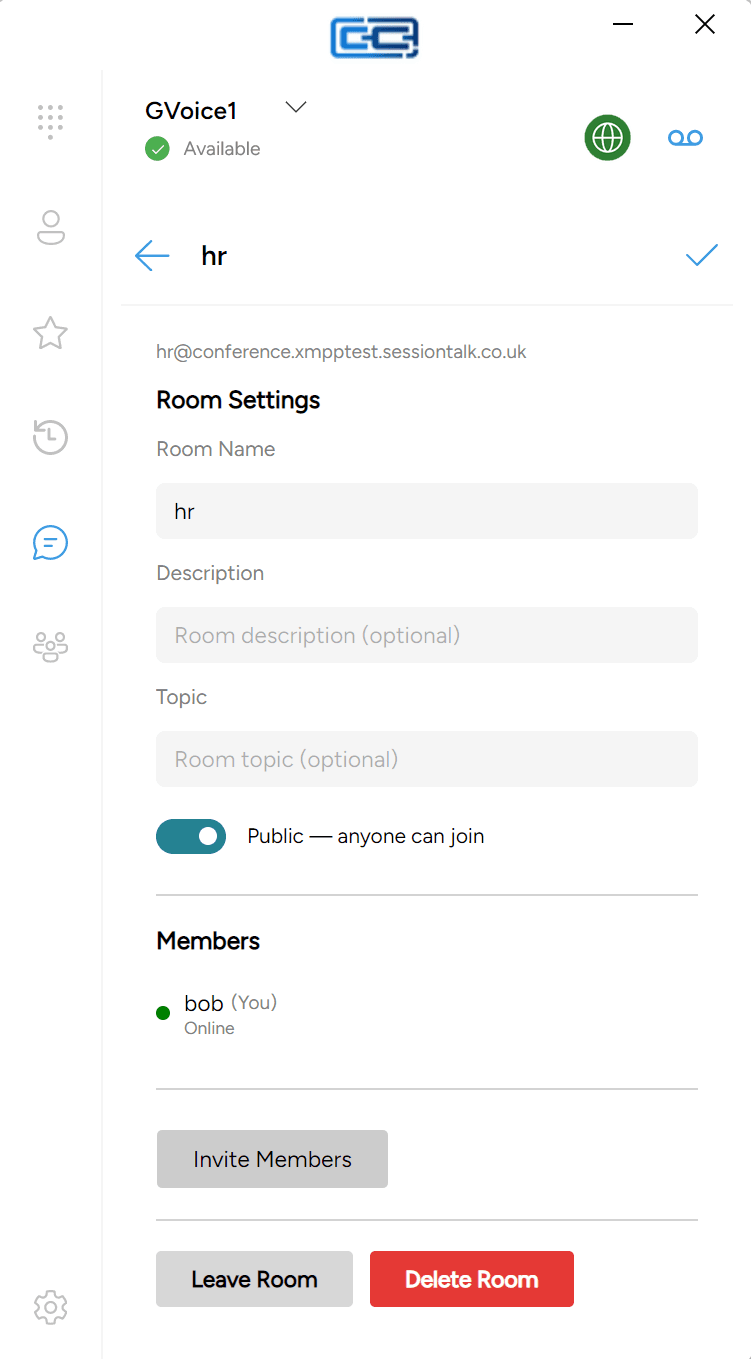
- In the room, click the gear icon.
- Near the bottom of the details panel, click Leave Room.
You stop receiving messages from the room and it disappears from your Joined Rooms list. You can rejoin later from the Join Room screen, as long as the room still allows you in.
Deleting a room
If you’re the room’s admin, you’ll see a red Delete Room button at the bottom of the details panel, next to Leave Room.
Delete Room removes the room from the server permanently, for everyone. There’s no confirmation prompt — the click takes effect immediately. Deleted rooms cannot be restored, all conversation history is lost, and every member is removed. Only use this when you’re sure the room is no longer needed.
Being removed from a room by an owner or moderator isn’t the same as choosing to leave. Either way the room disappears from your Joined Rooms; the difference is that if you were removed, you’ll need a fresh invitation to come back in.
Next steps
To manage your buddies and read the presence dots you see next to their names in one-to-one chats, see IM buddies and presence.